


How to Set Up Future Absence Notifications in Tensor.NET

Staying on top of staff’s planned absences can be a challenging task, especially for organizations with a very large number of employees.
In order to help our customers mitigate the issue above, we have developed a new feature within our Tensor.NET Time and Attendance software suite that enables it to check for future absences and, when these are found, triggers a notification email sent to the configured recipient.
Available in version 4.4.1.2 or above of Tensor.NET, a new task has been created within the systems Scheduling Service to allow the checking of future absences. To configure this feature, open the User Options program and navigate to the Services menu to locate the ‘Tensor Scheduling Service’. Open the service settings and click the ‘Extensions’ tab and then the ‘Notification Interface’ setting. Ensure the status of the service is ‘Active’ and then click the ‘Schedule Jobs’ tab at the top of the window to present the following screen.

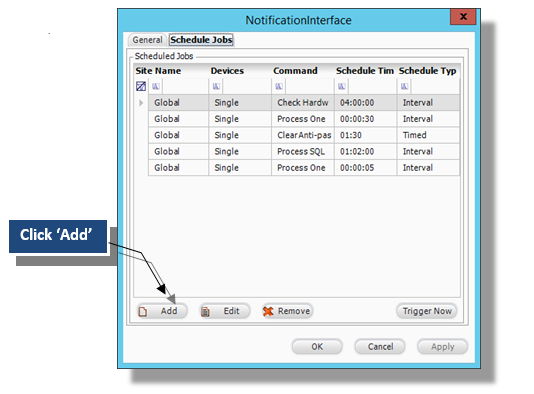
Here you can view any current jobs that are currently configured under the Notification Interface option.
Click the ‘Add’ option to create a new task for the service and to open the screen below.
Choose from either a set time, interval or chained options and enter the time. Choose the new ‘Check Upcoming Absences’ option from the drop down menu and then tick the required days you want this task to complete on.
The configuration shown here would send an email every Friday at 08:00am.
This job has a minimum period of 23 hours 59 minutes and 59 seconds. However, it is intended for use with the Time configuration.

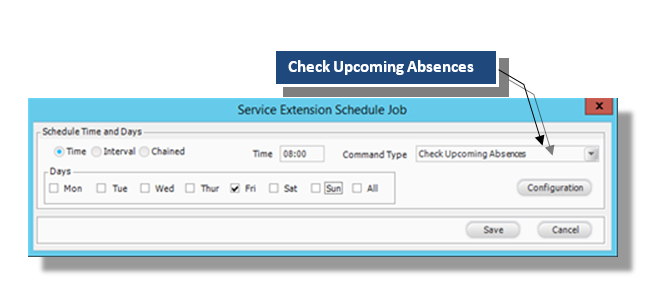
Select the ‘Configuration’ tab to display the pop up screen on the next page.
The configuration screen allows you to select the required absence codes that need to be included in the Email Alert.

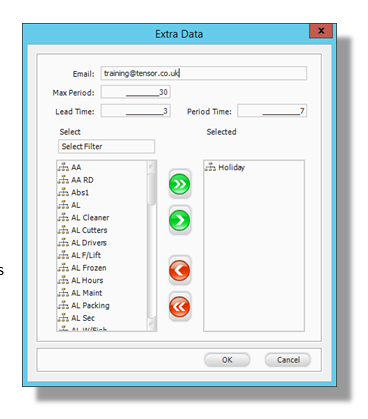
Email – Enter the email address of the recipient for the alert.
Max Period – Enter the ‘Max Period’ in days. The Max Period is the amount of days before and after the period time from which the data will be produced. This is to capture longer periods that fall outside of the ‘Period time’ set.
Lead time – Enter the lead time in days, the lead time is the amount of days after the selected day for the email for which you want the alert period to start.
Period Time – Enter the amount of days in which you want to capture for the upcoming absence.
Using the example configuration on the previous page, this would send an email every Friday at 08:00 displaying absences for the next week between Monday and Sunday (Period Time 7 Days) as the lead time is 3 days after the Friday. It will display absences that have a HOLIDAY absence code.
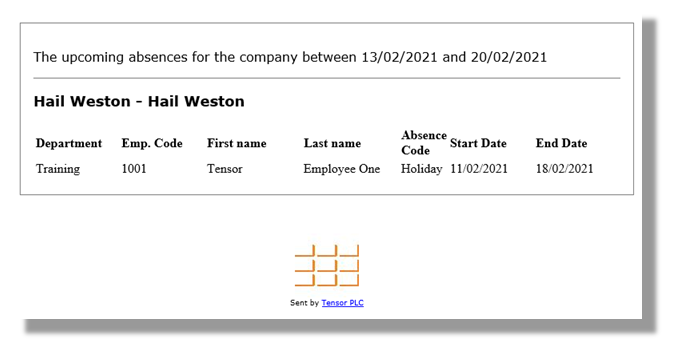
When absences are found, an email will be generated and then sent to the configured recipient. An example of the email received is shown here.

